Best Exterior House Painting Tips for Long-Lasting Results
Reading time: 14 minutes
Ever stared at your peeling, faded exterior paint and thought, “Why did this happen so fast?” You spent good money on that paint job two or three years ago, and now it looks like it survived a decade of neglect. You’re not alone. Millions of homeowners face the same frustrating cycle of premature paint failure — and most of it is entirely preventable.
Here’s the straight talk: A long-lasting exterior paint job isn’t about luck or even the most expensive paint on the shelf. It’s about strategic preparation, informed product selection, and precise application technique. Get these three pillars right, and your home’s exterior can look showroom-fresh for 10 to 15 years. Get them wrong, and you’re repainting in three.
In 2026, the exterior painting industry has evolved significantly. New paint formulations, smarter surface preparation tools, and a deeper understanding of climate-specific application have transformed what’s possible for the average homeowner. This guide cuts through the noise and delivers exactly what you need to know — whether you’re a first-timer picking up a brush or a seasoned DIYer looking to level up your results.
Table of Contents
- Why Exterior Paint Fails Prematurely
- Surface Preparation: The Foundation of Everything
- Choosing the Right Paint for 2026
- Tools and Equipment That Make the Difference
- Application Techniques for Professional Results
- Climate Considerations and Timing Your Project
- 3 Common Mistakes and How to Avoid Them
- Post-Paint Maintenance Strategy
- Frequently Asked Questions
- Your Exterior Painting Roadmap: Next Steps
Why Exterior Paint Fails Prematurely
Understanding failure modes is the first step toward preventing them. According to the Paint Quality Institute’s 2025 Annual Report, approximately 68% of premature exterior paint failures are directly attributable to poor surface preparation — not paint quality. That’s a staggering statistic that completely reframes how we should think about painting projects.
Paint fails in several distinct ways, each pointing to a specific root cause:
- Peeling and flaking: Usually caused by moisture trapped beneath the paint film, often due to skipping primer or painting over damp surfaces.
- Chalking: A powdery residue on the surface caused by UV degradation — more common with lower-quality paints or insufficient coats.
- Cracking and alligatoring: Happens when paint dries too quickly, when coats are applied too thick, or when incompatible products are layered.
- Fading: Accelerated by UV exposure and compounded by paints that lack adequate titanium dioxide content.
- Mildew and mold growth: A symptom of poor ventilation, high humidity climates, and paints without mildewcide additives.
Quick Scenario: Imagine a homeowner in Atlanta, Georgia, who repainted their wood-sided colonial in the spring of 2024 using a mid-grade latex paint. By late 2025, the south-facing wall was visibly peeling. Why? They painted over a slightly damp surface after morning rain, skipped primer on the bare wood sections, and chose a paint with minimal UV inhibitors for a region that sees intense summer sun. Every single failure mode was preventable.
Knowing why paint fails gives you the roadmap to make it last. Let’s build that roadmap together.
Surface Preparation: The Foundation of Everything
If there’s one non-negotiable truth in exterior painting, it’s this: the paint job is only as good as the surface beneath it. Professional painters consistently say they spend 70–80% of their project time on prep — and less than 30% on actual painting. That ratio might shock a beginner, but it explains everything about why professional results last so much longer.
Step-by-Step Surface Preparation
1. Thorough Cleaning
Start with a pressure wash of the entire exterior. In 2026, most painting professionals recommend using a pressure washer set between 1,500 and 2,500 PSI for most siding types. Softer wood siding benefits from lower pressure settings. Use a mildew-killing cleaning solution containing sodium hypochlorite (bleach) or a dedicated house wash concentrate to kill any existing mold or algae spores — not just remove the visible growth.
Allow the surface to dry completely. In moderate weather (65–80°F), this typically means waiting at least 48 to 72 hours after washing before you prime or paint. In humid climates, extend that window to 96 hours or more.
2. Scraping and Sanding
Remove all loose, peeling, or flaking paint using a quality paint scraper. Follow up with coarse-grit sandpaper (80-grit) on bare areas and medium-grit (120-grit) on painted sections that feel rough or uneven. This mechanical abrasion creates microscopic texture for the primer to bond to — a step that dramatically extends adhesion life.
3. Caulking and Gap Sealing
One of the most overlooked prep steps. Inspect every seam, joint, window frame, door frame, and corner. Use a paintable exterior-grade caulk — specifically a siliconized acrylic latex formulation — to seal any gaps wider than 1/8 inch. Unsealed gaps are moisture entry points that will undermine your paint job from within, causing bubbling and peeling within 18–24 months.
4. Priming — Never Skip This Step
Apply a high-quality exterior primer to all bare wood, metal, or masonry surfaces. In 2026, stain-blocking primers with shellac or oil-alkyd bases remain the gold standard for problem surfaces (tannin-bleeding cedar, old oil-based paint, heavily stained concrete). For general priming over previously painted surfaces in good condition, a premium acrylic bonding primer works excellently. Spot-prime at minimum; full-surface priming is ideal for maximum durability.
Surface-Specific Preparation Tips
Wood siding: Check for rot before anything else. Probe suspicious areas with a screwdriver — if the wood compresses or crumbles, it needs repair or replacement before painting. Fill minor imperfections with an exterior wood filler rated for paintability. Sand smooth when cured.
Masonry and stucco: Fill cracks with elastomeric caulk or masonry patching compound. Etch new concrete or masonry with a diluted muriatic acid solution (follow all safety protocols) to open the pores for better primer absorption.
Previously painted metal surfaces: Sand with 120-grit to remove oxidation, apply a rust-inhibiting metal primer, and use a direct-to-metal (DTM) topcoat for best results.
Choosing the Right Paint for 2026
The paint market in 2026 offers more sophisticated options than ever before. The challenge is cutting through marketing claims to find what genuinely performs. Here’s how to think about paint selection strategically.
Paint Types Compared
The ongoing debate between 100% acrylic latex and oil-based paints has largely been settled in favor of premium acrylics for most exterior applications. Modern acrylic formulations cure harder, resist UV degradation better, remain flexible through temperature cycles, and dry faster — addressing nearly every historical advantage oil-based paints held. However, for specific applications like trim, metal, and highly porous surfaces, alkyd (oil-modified) formulations still deliver superior results.
In 2026, elastomeric coatings have gained significant traction for stucco, concrete block, and brick exteriors. These thick, rubber-like coatings bridge hairline cracks, create a waterproof membrane, and can last 10–15 years. They’re more expensive upfront but represent excellent value over time.
Expert Quote: According to renowned paint chemist Dr. Sandra Kowalczyk, writing in the Journal of Coatings Technology in early 2026: “The single most impactful advancement in exterior coatings over the past five years is the integration of ceramic microsphere technology and advanced UV-reactive polymers, which together can extend service life by 40–60% compared to standard latex formulations from a decade ago.”
Key Paint Selection Metrics
| Paint Type | Best For | Average Lifespan | Price Range (per gallon, 2026) | VOC Level |
|---|---|---|---|---|
| 100% Acrylic Latex | Wood, vinyl, fiber cement siding | 8–12 years | $45–$85 | Low to Zero |
| Alkyd/Oil-Based | Trim, metal, high-traffic areas | 6–10 years | $40–$75 | High |
| Elastomeric Coating | Stucco, masonry, concrete | 10–15 years | $60–$120 | Low |
| Ceramic-Infused Acrylic | High-sun, extreme-climate homes | 12–16 years | $75–$130 | Very Low |
| Waterborne Alkyd Hybrid | Trim, doors, detailed woodwork | 8–12 years | $55–$95 | Low |
Pro Tip: Always check the paint’s solids content by volume — listed on the technical data sheet. Premium exterior paints typically have 40–55% solids content. Higher solids means more actual paint film deposited per coat, which directly translates to better coverage and durability. Don’t be fooled by gallon price alone.
Tools and Equipment That Make the Difference
Using the right tools doesn’t just make the job easier — it fundamentally affects the quality and longevity of the finish. The best paint applied with the wrong tools will underperform every time.
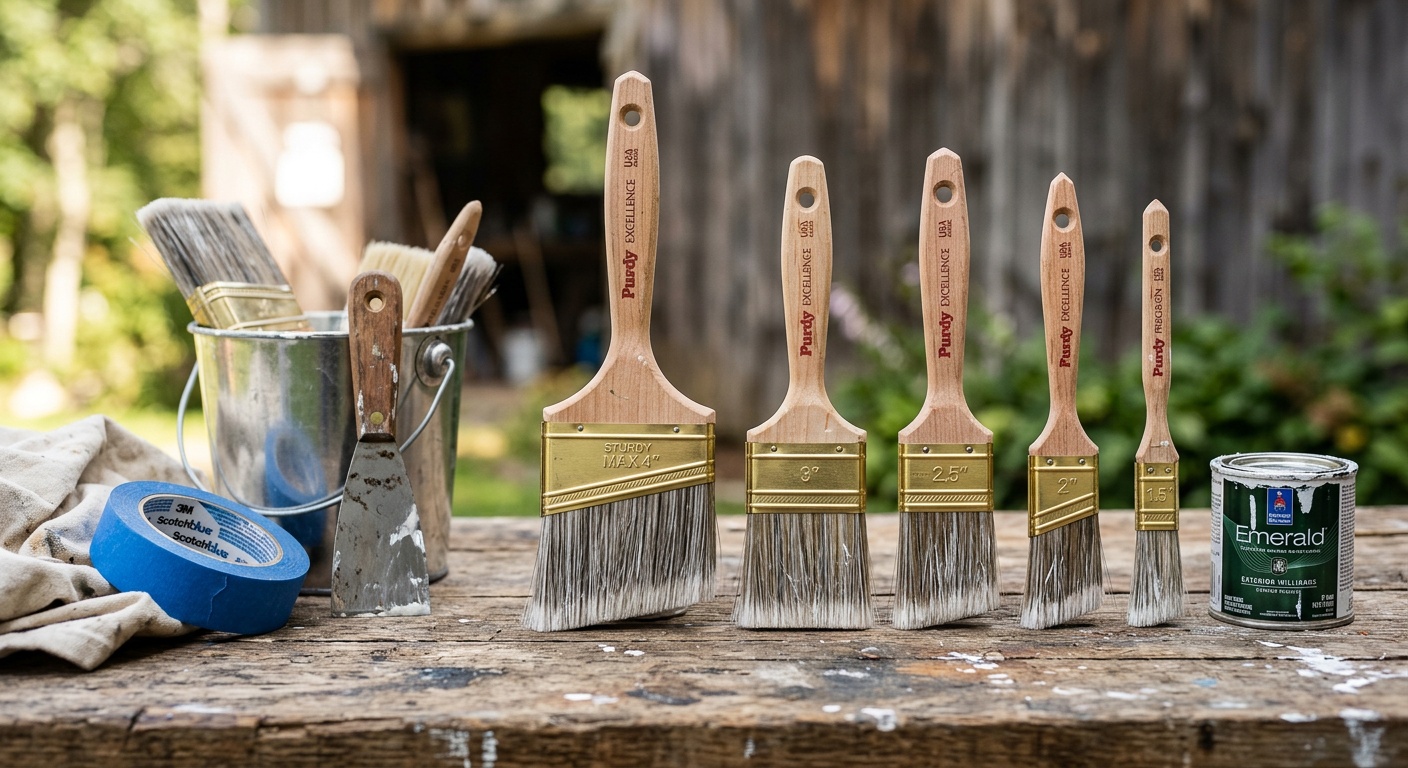
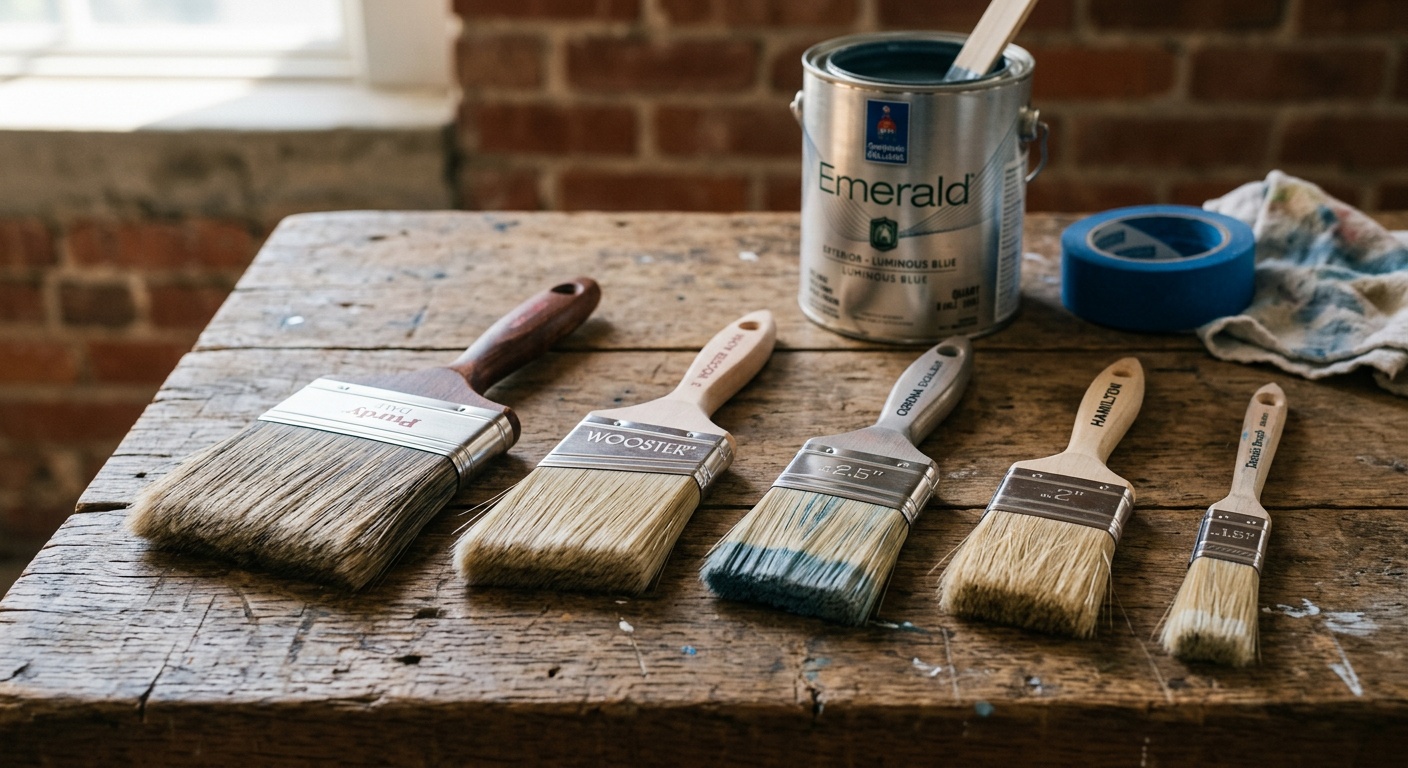
- Brushes: For cutting in and trim work, invest in high-quality synthetic bristle brushes (nylon/polyester blend) for latex paints. A 2.5-inch angled sash brush handles most trim situations. Cheap brushes leave streaks, lose bristles, and make precision work unnecessarily difficult.
- Rollers: Use a 3/8-inch nap roller cover for smooth siding and a 1/2-inch to 3/4-inch nap for rougher surfaces like stucco or textured wood. Always use a roller cage with a sturdy frame — wobbly frames create uneven pressure and inconsistent film thickness.
- Airless sprayer: For large surface areas, an airless sprayer dramatically speeds up application and produces an exceptionally smooth, even film when used correctly. In 2026, compact professional-grade sprayers from brands like Graco and Titan are available for rental at most home improvement centers. Use a 0.015–0.017 tip orifice for standard latex exterior paints.
- Pressure washer: As covered in preparation — rent or own a quality unit with adjustable pressure settings.
- Scaffolding or quality ladders: Safety first. Proper access equipment isn’t just safer — it lets you work with both hands and apply paint correctly without overstretching or awkward angles that compromise finish quality.
Application Techniques for Professional Results
Even with perfect prep and top-tier materials, poor application technique can undermine everything. Here’s where many DIYers leave performance on the table.
The Wet Edge Principle
The most important concept in professional exterior painting is maintaining a wet edge. This means always painting into freshly applied paint before it begins to dry, preventing lap marks and roller lines. Work methodically — section by section — rather than randomly hopping around the surface. Lap marks are one of the most common complaints in amateur paint jobs and are entirely preventable with proper technique.
Coat Thickness and Number of Coats
Apply paint in thin, even coats rather than thick single applications. Thick coats trap solvents, dry unevenly, crack as they cure, and reduce overall adhesion. Most premium exterior paints perform best when applied at the manufacturer’s recommended spread rate — typically 350–400 square feet per gallon for topcoats.
Plan for a minimum of two full topcoats over primer. Three coats on severely weathered surfaces or for maximum longevity. Always allow each coat to dry fully according to the manufacturer’s recoat window before applying the next — rushing this step creates intercoat adhesion failures.
Spray, Back-Roll, Back-Brush
When using an airless sprayer, professional painters use a technique called spray-and-back-roll: spray the paint on the surface and immediately follow with a roller to work the paint into the substrate and eliminate sag. For wood siding with pronounced grain, back-brushing (following with a brush) drives paint into the grain for even better penetration and adhesion. This three-step approach produces results significantly more durable than spray application alone.
Direction of Application
Always apply paint with overlapping strokes in the direction that sheds water — horizontal on most siding, following the lap on lap siding, or top-to-bottom on board-and-batten or shingles. This ensures paint overlaps properly and channels rather than traps moisture at the edges.
Climate Considerations and Timing Your Project
Paint manufacturers spend enormous resources developing products — then specify narrow environmental windows for application because those conditions genuinely determine performance. Ignoring climate guidance is one of the fastest paths to premature paint failure.
Ideal conditions for exterior painting in 2026 (and always):
- Temperature: Between 50°F and 90°F (10°C–32°C) — both air and surface temperature
- Relative humidity: Below 70%
- No direct intense sun on the working surface (paint dries too fast, causing lap marks and poor film formation)
- No rain forecast for at least 24–48 hours after application
- Wind below 15 mph (excessive wind dries paint too fast and carries debris into fresh paint)
Case Study — Pacific Northwest Timing Strategy: A Portland, Oregon homeowner in the summer of 2025 scheduled her Victorian home repaint strategically around the Pacific Northwest’s narrow dry season window. By monitoring a 14-day weather forecast and selecting a professional-grade low-temperature cure acrylic rated for application down to 35°F, she extended her viable painting season by nearly three weeks on either side of summer. The result was a beautifully executed job that, two seasons later, shows zero signs of moisture-related failure despite the region’s notorious rainfall.
In regions with extreme summer heat — Arizona, Texas, Florida in 2026 — schedule work for early morning hours before surface temperatures exceed 90°F. Hot surfaces cause paint to dry before it can properly level and penetrate, resulting in a brittle film with compromised adhesion.
Paint Longevity by Region — 2026 Comparative Chart
Average Years Between Exterior Repaints by Climate Zone
Source: National Painting Contractors Association, 2025 Regional Performance Study. Based on premium acrylic latex with proper preparation.
3 Common Mistakes and How to Avoid Them
Mistake #1: Painting in Direct Sunlight
Many homeowners instinctively choose the sunniest day for painting — after all, sunshine means it’ll dry fast, right? Wrong. Direct sunlight on the painted surface causes the outer skin of the paint to dry while the interior is still wet and off-gassing solvents. This creates a weak, brittle film riddled with micro-blisters. Solution: Follow the sun around the house. Paint east-facing walls in the afternoon, west-facing walls in the morning, and north-facing walls at any time. It takes more planning but pays off enormously in film quality.
Mistake #2: Skipping the Primer on Bare Spots
Spot-priming might feel tedious when you’re eager to apply color, but it’s non-negotiable. Bare wood, metal, or masonry absorbs topcoat paint unevenly, leaving thin areas of coverage that are vulnerable to moisture and UV. Worse, bare wood tannins (especially in cedar and redwood) can bleed through latex topcoats, causing unsightly brown staining that no amount of topcoating will fully hide. Solution: Use a dedicated stain-blocking primer on all bare areas and allow full cure time before topcoating.
Mistake #3: Underestimating Paint Quantity
Running short mid-project forces you to buy additional cans that may have subtle color batch variations — visible in the final result in certain lighting conditions. It also tempts you to over-thin remaining paint, compromising film thickness. Solution: Use the 1.5x rule: calculate the square footage of your exterior, divide by the paint’s coverage rate per gallon, then multiply by 1.5 to account for rough surfaces, multiple coats, and waste. Buy from the same production batch (same lot number) when possible.
Post-Paint Maintenance Strategy
The best exterior paint job benefits enormously from a simple annual maintenance routine. Think of it like maintaining your vehicle — regular small investments prevent expensive overhauls.
Annual maintenance checklist:
- ✅ Inspect caulking around all windows, doors, and joints each spring. Re-caulk any cracked or shrinking sections.
- ✅ Rinse the exterior with a garden hose (low pressure) to remove dirt, pollen, and biological growth before it bonds to the paint film.
- ✅ Touch up any minor paint chips or scratches immediately — exposed bare substrate is a moisture entry point that expands rapidly.
- ✅ Check gutters and downspouts. Overflowing gutters are one of the leading causes of localized paint failure on fascia and soffits.
- ✅ Trim vegetation back from the house. Plants touching the exterior trap moisture and accelerate paint breakdown.
- ✅ Inspect for mildew growth, especially on north-facing or shaded walls. Treat with a diluted bleach solution before it spreads.
A study published by the Rohm and Haas Paint Quality Institute found that homeowners who performed basic annual exterior maintenance extended the time between full repaints by an average of 2.7 additional years. That translates to thousands of dollars in deferred painting costs and sustained curb appeal — a compelling return on a few hours of effort each year.
Frequently Asked Questions
How many coats of paint does an exterior really need?
For most exterior repaints over previously painted surfaces in reasonable condition, two topcoats over a primer coat is the professional standard — and the minimum for durability. If you’re painting over a dramatically different color (dark to light or vice versa), or if the surface is heavily weathered, three coats are recommended. On new bare wood or masonry, a dedicated primer coat plus two topcoats is non-negotiable. More coats beyond three rarely provide additional benefit and can actually reduce flexibility, leading to cracking.
Can I paint my house exterior in cooler temperatures?
In 2026, several premium paint brands — including Sherwin-Williams’ Emerald Exterior and Benjamin Moore’s Aura Exterior — offer low-temperature formulations rated for application down to 35°F (2°C). This has extended the viable painting season in northern climates significantly. However, surface temperature matters as much as air temperature — cold substrates inhibit proper paint adhesion and film formation regardless of air conditions. Always check both the air temperature and the surface temperature before proceeding, and never apply paint when temperatures will drop below freezing within 24 hours of application.
How do I know when it’s time to repaint rather than do touch-ups?
The clearest signals that touch-ups won’t suffice are widespread chalking across more than 30% of the surface, cracking or alligatoring over large areas, paint peeling from the substrate in sheets rather than isolated chips, and visible wood grain showing through paint (indicating total film failure). If more than 25–30% of the exterior surface shows these symptoms, a full repaint will be more cost-effective than ongoing touch-up cycles. Additionally, if caulking is failing systematically at most joints, it’s typically more efficient to repaint the whole exterior while resealing everything comprehensively, rather than spot-treating indefinitely.
Your Exterior Painting Roadmap: Next Steps
You now have the framework that separates paint jobs that last a decade from those that fail within two years. The knowledge is here — the difference between a frustrating redo and a genuinely durable result comes down to how systematically you apply it. Here’s your immediate action plan:
- Conduct a surface audit this weekend. Walk your entire exterior with a screwdriver and a critical eye. Document bare wood, peeling sections, failing caulk, and any signs of mildew. This assessment shapes everything that follows.
- Choose your paint before you prep. Read technical data sheets, compare solids content, and select a paint engineered for your specific climate zone. The 2026 market offers genuinely superior options — take 30 minutes to research rather than defaulting to whatever’s on sale.
- Allocate proper prep time. Budget 60–70% of your total project time for cleaning, scraping, caulking, and priming. If that feels excessive, remind yourself that 68% of paint failures trace back to preparation shortcuts.
- Paint during optimal weather windows. Check a 5-day forecast, monitor surface temperatures, and plan your painting schedule to avoid direct sunlight, humidity above 70%, and temperatures outside the 50–90°F range.
- Commit to annual maintenance. Set a calendar reminder every spring for your exterior inspection and minor touch-up routine. The compounding value of this habit is extraordinary.
In a broader context, the exterior painting decisions you make today are increasingly connected to energy efficiency and climate resilience. Reflective “cool roof” and “cool wall” paint technologies — now widely available in 2026 — can reduce exterior wall surface temperatures by up to 40°F, meaningfully reducing cooling costs in hot climates. Your next paint project isn’t just cosmetic maintenance; it’s an investment in your home’s comfort and long-term value.
Here’s the question worth sitting with: What would it mean for your home — and your household budget — if the next paint job you commissioned or completed yourself genuinely lasted 12 to 15 years instead of five? That outcome is entirely within your reach, and it starts with the first informed decision you make on your next project. Your home’s exterior is its first impression, its armor against the elements, and one of its most impactful value drivers. Paint it like you mean it.