Foundation Waterproofing Coatings That Actually Protect Your Home
Reading time: 14 minutes
Water is patient. It doesn’t knock before entering your home — it seeps, permeates, and slowly undermines the very structure holding your family safe. If you’ve ever walked into your basement after a heavy rainstorm and felt that familiar dread of dampness rising from the walls, you already understand what’s at stake. Foundation waterproofing isn’t a luxury upgrade. In 2026, with increasingly volatile weather patterns and the rising cost of structural repairs, it’s the smartest investment a homeowner can make.
But here’s the problem: the market is flooded (pun intended) with products making bold claims. Not all coatings are created equal, and choosing the wrong one can mean wasted money, continued moisture intrusion, and structural damage that compounds year over year. This guide cuts through the noise and gives you the real, practical roadmap to foundation waterproofing coatings that actually work.
Table of Contents
- Why Foundation Waterproofing Matters More Than Ever in 2026
- Types of Foundation Waterproofing Coatings Explained
- Head-to-Head Comparison: Which Coating Is Right for You?
- Application Best Practices: Getting It Right the First Time
- Real-World Case Studies: What Actually Happened
- Performance Data: How Coatings Stack Up
- Common Challenges and How to Overcome Them
- Frequently Asked Questions
- Your Waterproofing Action Plan: Protect Your Home Starting Today
Why Foundation Waterproofing Matters More Than Ever in 2026
According to the National Association of Home Builders (NAHB), water damage and moisture intrusion now account for over 34% of all homeowner insurance claims in the United States, a figure that has risen steadily over the last five years. The Insurance Information Institute reported in early 2026 that the average water damage repair claim now exceeds $14,800 — and that’s before factoring in mold remediation, which can add another $10,000–$30,000 to the bill.
Beyond the financial dimension, there’s a health element that too many homeowners overlook. The EPA estimates that approximately 21 million homes in the U.S. have mold problems directly linked to foundation moisture intrusion. Mold spores don’t stay in the basement — they travel through HVAC systems and affect indoor air quality throughout the entire living space.
Climate data from 2025 painted a sobering picture: extreme precipitation events increased by 17% compared to the 2010–2020 average, meaning foundations built even a decade ago weren’t designed for today’s rainfall intensity. Retrofitting with high-performance waterproofing coatings has moved from “smart planning” to “urgent necessity.”
“We’re seeing a fundamental shift in how homeowners and contractors think about foundation protection. It’s no longer reactive — it’s strategic. The best time to apply a quality waterproofing coating was during construction. The second-best time is right now.” — Dr. Melissa Hartwell, Structural Engineering Consultant, BuildSafe Institute, 2026
Types of Foundation Waterproofing Coatings Explained
Not all waterproofing coatings function the same way, and this distinction matters enormously when you’re making a purchasing decision. Let’s walk through the primary categories with clarity and purpose.
Crystalline Waterproofing Coatings
These are among the most technologically advanced options available in 2026. Crystalline coatings work through a remarkable chemical reaction: when applied to concrete, the active chemicals penetrate the surface and react with water and cement particles to form insoluble crystals that physically block water pathways — even hairline cracks.
Brands like Xypex and Krystol have dominated this category for years, and they continue to lead the market. What makes crystalline coatings exceptional is their self-healing property. If a new crack forms after application, the remaining dormant crystalline chemicals reactivate in the presence of moisture and seal the new breach automatically.
Best for: Below-grade concrete foundations, especially in areas with high hydrostatic pressure. Ideal when the coating will be permanently buried and inaccessible for reapplication.
Limitations: Works only on concrete or cementitious substrates. Not suitable for block foundations without a parge coat. Higher upfront cost — typically $3.50–$6.00 per square foot for professional application.
Elastomeric / Polymer-Modified Coatings
Elastomeric coatings have earned their place as the workhorse of the waterproofing industry. These rubber-based formulations stretch and flex with the natural movement of your foundation — seasonal expansion, contraction, minor settling — without cracking or losing adhesion. They create a seamless, continuous membrane over the exterior or interior surface.
Products like DRYLOK Extreme, RadonSeal Plus, and Ames Super Elasto-Barrier represent the modern evolution of this category. In 2025, Ames Blue Max received updated certification for waterproofing pressures up to 12 PSI hydrostatic pressure, making it suitable for foundations up to 28 feet below grade.
Best for: Homeowners seeking a DIY-friendly solution for poured concrete or block foundations. Also excellent for above-grade exterior walls where vapor permeability needs to be managed.
Limitations: Requires meticulous surface preparation. Any existing moisture or efflorescence on the wall surface will compromise adhesion. Multiple coats are usually required for full protection.
Cementitious Waterproofing Coatings
The most straightforward and affordable option, cementitious coatings are essentially a cement-based slurry mixed with waterproofing additives. They bond chemically with the concrete substrate and create a rigid, breathable barrier against liquid water. Brands like Thoroseal and Quikrete Hydraulic Water-Stop remain popular choices.
These coatings are rigid — they don’t flex — which means they’re vulnerable to cracking if the foundation moves at all. That makes them better suited for stable, older foundations that have already finished settling, rather than new construction where movement is still occurring.
Best for: Interior waterproofing of stable block or concrete foundations. Wet areas like cisterns, retaining walls, and planters. Budget-conscious homeowners with minor seepage issues.
Cost range: Typically $1.20–$2.80 per square foot for DIY application — one of the most affordable entry points in the category.
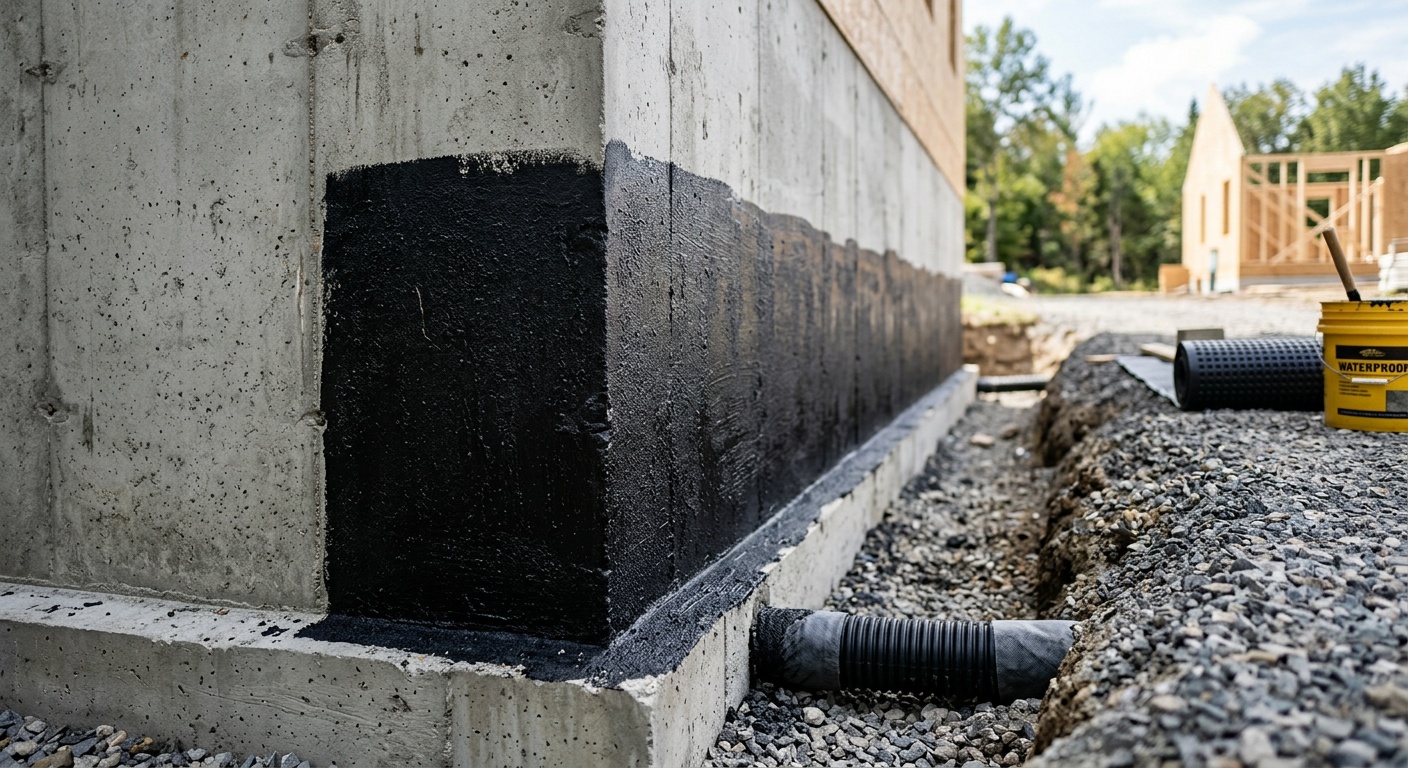
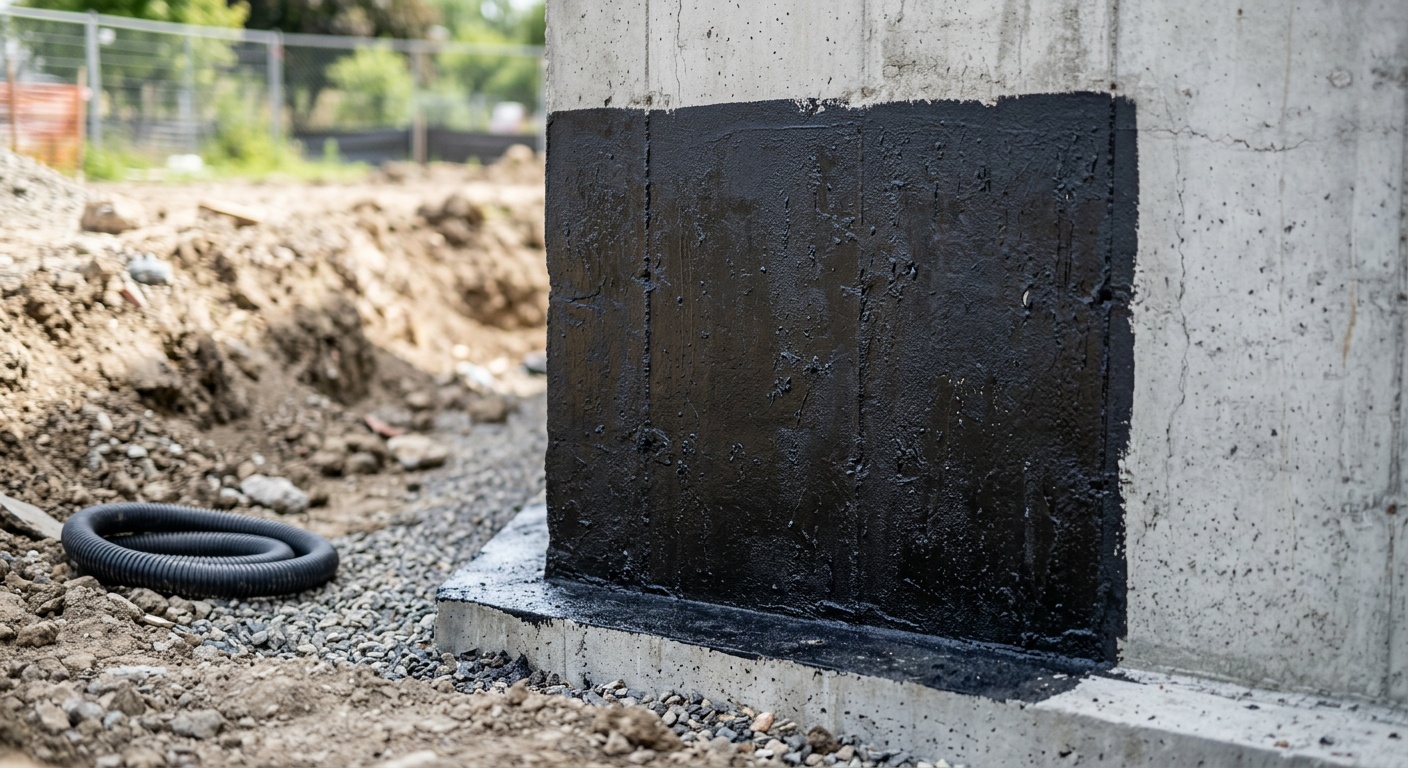
Bituminous / Asphalt-Based Coatings
Often applied during new construction, bituminous coatings are the black, tar-like substances you’ve likely seen on the exterior of foundation walls before backfilling. They’re waterproof, durable, and cost-effective for basic below-grade protection. However, they become brittle in cold temperatures and degrade with UV exposure if left unburied.
Modern formulations have improved significantly. Henry 107 and Karnak 81AF now include polymer modifiers that improve flexibility and longevity, addressing many of the classic criticisms of traditional asphalt coatings.
Polyurethane Liquid Membranes
At the premium end of the spectrum, polyurethane liquid membranes offer outstanding elongation properties (some up to 900% stretch) and exceptional adhesion to virtually any substrate — concrete, masonry, wood, metal. They cure into a continuous, seamless membrane that bonds intimately with the substrate surface. Products like Tremco ExoAir 220 and Sika Sikalastic are specified by structural engineers on high-value projects worldwide.
The trade-off is cost: professional application of polyurethane membranes runs $8–$15 per square foot, placing them firmly in the professional contractor territory rather than DIY projects.
Head-to-Head Comparison: Which Coating Is Right for You?
| Coating Type | Avg. Cost/sq ft | DIY Friendly | Lifespan | Best Application |
|---|---|---|---|---|
| Crystalline | $3.50–$6.00 | Moderate | Lifetime (self-heals) | Below-grade concrete, high hydrostatic pressure |
| Elastomeric/Polymer | $2.00–$4.50 | Yes | 10–20 years | Interior/exterior block or poured concrete |
| Cementitious | $1.20–$2.80 | Yes (easiest) | 5–10 years | Stable interior walls, minor seepage |
| Bituminous/Asphalt | $1.50–$3.00 | Yes | 5–15 years | New construction exterior below grade |
| Polyurethane Membrane | $8.00–$15.00 | No (professional) | 25+ years | High-value properties, complex geometries |
Application Best Practices: Getting It Right the First Time
Even the most advanced waterproofing coating will fail if it’s applied incorrectly. This is where most DIY projects go wrong — and where professional contractors separate themselves from amateurs. Here’s the non-negotiable framework for successful application.
Surface Preparation: The Make-or-Break Step
Ask any waterproofing professional about the most critical phase of the job, and you’ll hear the same answer: surface preparation. A coating applied to a dirty, damp, or structurally compromised surface will delaminate, blister, and fail — often within the first wet season.
The preparation checklist varies by coating type, but universal requirements include:
- Remove all existing paint, efflorescence, and loose material using a wire brush, mechanical grinder, or pressure washer rated at minimum 3,000 PSI
- Fill active cracks and voids with hydraulic cement or a compatible crack filler before applying the main coating layer
- Achieve the correct surface moisture level — most coatings specify either a damp surface (saturated surface dry, or SSD) or a completely dry surface. Read the manufacturer specs carefully
- Test for hydrostatic pressure — if water is actively pushing through the wall, you need a coating designed for positive-side (interior) or negative-side application
- Check for structural cracks wider than 1/4 inch, which require structural repair before any waterproofing coating is applied
Application Techniques That Matter
The “how” of application is as important as the “what.” For brush-applied coatings, use a stiff-bristled masonry brush rather than a roller to ensure the material is worked into surface pores rather than just sitting on top. For spray applications, maintain consistent distance and overlap passes by 50% to avoid thin spots. Key reminders:
- Apply coatings at temperatures between 40°F and 90°F for optimal curing
- Never apply waterproofing coatings to frozen surfaces or when frost is expected within 24 hours
- Allow full cure time between coats — skipping ahead is the single most common cause of application failure
- Pay special attention to cove joints (where wall meets floor) — these are the highest-risk areas for water infiltration
- Apply a second coat perpendicular to the first for maximum coverage uniformity
Real-World Case Studies: What Actually Happened
Theory is useful. Real-world outcomes are instructive. Here are two scenarios drawn from documented projects in 2025–2026 that illustrate both the power of quality waterproofing and the cost of getting it wrong.
Case Study 1: The Columbus Ohio Ranch Home Rescue
In suburban Columbus, Ohio, homeowner Karen Whitfield purchased a 1972 ranch home in March 2025. Within her first spring, she noticed persistent damp spots on the east wall of her basement and a musty odor that became unbearable by May. A home inspector confirmed moisture infiltration through the poured concrete wall, with efflorescence indicating long-term water movement.
Rather than invest in an interior drainage system (quoted at $9,500 by a local contractor), Karen chose an exterior crystalline waterproofing approach. The foundation was excavated on the east side, the existing bituminous coating (original to the home’s construction) was scraped clean, and two coats of Xypex Concentrate were brush-applied across the exposed surface. The total project cost, including excavation and labor, came to $4,200.
By fall 2025, the basement was dry through multiple rain events, and by spring 2026 — historically the wettest season — there had been zero moisture intrusion. The crystalline coating’s self-sealing property had also addressed two hairline cracks that formed during winter frost cycles. Karen’s investment paid for itself by avoiding both the interior drainage system cost and projected mold remediation.
Case Study 2: When the Wrong Product Costs More
In contrast, a newly constructed home in Austin, Texas applied a standard latex paint-based “waterproofing” product — the kind sold at big-box stores for under $30 per gallon — to interior basement walls during construction in 2024. By early 2026, moisture vapor transmission had caused the coating to blister and peel extensively, and mold colonies were identified behind stored furniture. The remediation cost: $22,000, including mold removal, structural drying, and application of a proper elastomeric coating system.
The lesson is clear and worth repeating: decorative masonry paint is not a waterproofing coating. Products must explicitly state waterproofing ratings, hydrostatic pressure resistance, and vapor permeability data to be trusted for genuine moisture protection.
Performance Data: How Coatings Stack Up
Based on independent testing data compiled by the Waterproofing Contractors Association (WCA) 2026 Annual Report, here’s how the major coating categories compare on their most critical performance metric — hydrostatic pressure resistance:
Hydrostatic Pressure Resistance by Coating Type (PSI Rating)
Source: WCA 2026 Annual Performance Testing Report. PSI values represent typical maximums under standardized test conditions.
Context matters here: a foundation at 10 feet below grade experiences approximately 4.3 PSI of hydrostatic pressure from saturated soil. At 20 feet, that rises to approximately 8.7 PSI. This means that for most residential foundations (typically 6–10 feet below grade), even cementitious coatings provide adequate pressure resistance — but elastomeric or crystalline coatings offer a meaningful safety margin against unexpected saturation events during extreme storms.
Common Challenges and How to Overcome Them
Even well-intentioned waterproofing projects run into obstacles. Here are the three most common challenges homeowners face — and the strategies that actually work.
Challenge 1: Identifying the True Source of Moisture
Moisture in a basement can come from three sources: groundwater hydrostatic pressure, water running in from cracks or gaps, or condensation forming on cool surfaces from warm interior air. Applying a waterproofing coating when the problem is actually condensation is a waste of money — you need a dehumidifier and better vapor control instead.
The tape test: Tape a 12-inch square of aluminum foil to the damp wall and seal all four edges with waterproof tape. Wait 24–48 hours. If moisture forms on the room-facing side of the foil, your problem is condensation. If moisture forms on the wall-side of the foil, you’re dealing with liquid water intrusion — and waterproofing coatings are the right tool.
Challenge 2: Applying Coatings to Block Foundations
Concrete block (CMU) foundations present unique challenges because they’re hollow — water can travel through the hollow cores and emerge at mortar joints in unpredictable patterns. Crystalline coatings work well here only when paired with filling the cores with crystalline grout. Elastomeric coatings must be applied in sufficient thickness (typically two or three coats at the specified coverage rate) to bridge the mortar joint texture without creating thin spots.
Pro tip: Apply a cementitious parge coat first to create a smoother, more uniform surface, then apply your primary elastomeric or crystalline coating over it once fully cured.
Challenge 3: Managing Expectations About Interior vs. Exterior Application
Interior waterproofing coatings do not stop water from entering your foundation wall — they manage water after it has already penetrated the outer face of the concrete. Exterior coatings, applied to the outside face of the wall before backfilling, are technically superior because they address the source of intrusion directly. However, exterior application on an existing home requires excavation, which dramatically increases cost.
When exterior excavation isn’t practical, interior crystalline coatings remain an excellent choice because the crystals actually penetrate into the concrete and create a true barrier within the wall matrix itself — not just on the interior surface. This is a meaningful distinction compared to surface-applied elastomeric products used on the interior.
Frequently Asked Questions
Can I apply waterproofing coatings over painted basement walls?
In most cases, no — and attempting to do so is one of the most common and costly mistakes homeowners make. Paint creates a layer that prevents the waterproofing coating from bonding directly to the masonry substrate. The coating will adhere to the paint rather than the concrete, and when hydrostatic pressure builds, the paint layer delaminates, taking your waterproofing investment with it. Existing paint must be removed mechanically (grinding, wire brushing, or sandblasting) before applying any true waterproofing coating. The only exception is if the existing product is a compatible primer specified by the waterproofing manufacturer.
How long do foundation waterproofing coatings last, and when should I reapply?
Longevity varies dramatically by product type and application conditions. Cementitious coatings typically last 5–10 years before losing effectiveness. Elastomeric polymer coatings generally perform well for 10–20 years. Crystalline coatings, once properly applied, are theoretically permanent — the crystals become part of the concrete matrix and do not degrade over time. Polyurethane membranes, when professionally applied, carry manufacturer warranties of 25+ years. Signs that reapplication is needed include new efflorescence forming, visible coating delamination, or resumed moisture intrusion despite an existing coating. Annual visual inspections during spring are recommended practice for any waterproofed foundation.
Is DIY waterproofing effective, or do I need a professional contractor?
DIY application is absolutely viable for cementitious and elastomeric coatings, provided you follow surface preparation protocols religiously and choose products rated for your specific moisture challenge. However, if you’re dealing with active water intrusion under hydrostatic pressure, significant structural cracks, or a foundation deeper than 15 feet below grade, professional assessment is strongly recommended before any coating application. The cost of getting it wrong — mold remediation, structural repairs, and repeat waterproofing — consistently exceeds the cost of professional consultation upfront. For crystalline products, some manufacturers offer training certifications for DIY applicators, which ensures proper mixing ratios and application technique. When in doubt, pay for a one-time consultation with a certified waterproofing inspector before purchasing any materials.
Your Waterproofing Action Plan: Protect Your Home Starting Today
You now have a comprehensive, practical framework for understanding foundation waterproofing coatings — not in vague theoretical terms, but in the specific, decision-relevant detail that translates into real protection for your home. Here’s how to move from information to action.
- Step 1 — Diagnose before you buy. Perform the aluminum foil tape test this week. Identify whether you’re dealing with condensation, seepage, or hydrostatic pressure. The right diagnosis determines the right product.
- Step 2 — Match the coating to your specific conditions. Use the comparison table in this article as your decision guide. Consider your foundation type (poured concrete vs. block), depth, interior vs. exterior access, and budget.
- Step 3 — Invest in preparation, not just product. Budget at least 40% of your project time and effort for surface preparation before a single drop of coating touches your walls. This single step determines your long-term outcome more than any other factor.
- Step 4 — Document your application. Photograph the condition before, during, and after application. Record the product batch number, application date, temperature, and number of coats. This documentation is invaluable for warranty claims and future maintenance decisions.
- Step 5 — Schedule annual inspections. Each spring, spend 30 minutes in your basement after the first major rain event. Look for new efflorescence, damp spots, or coating changes. Early detection is always cheaper than remediation.
In 2026, with climate volatility driving more intense precipitation events and construction costs at historic highs, the financial and health case for proactive foundation waterproofing has never been stronger. The gap between homeowners who act preventively and those who react to damage is measured in tens of thousands of dollars — and in the peace of mind that comes from knowing your home’s most critical structural element is genuinely protected.
Your foundation is the silent backbone of everything you’ve built. Ask yourself honestly: when was the last time you gave it the attention it deserves? Your next rain event is already on the forecast — are your walls ready for it?