DIY Basement Floor Waterproofing: Materials and Methods Explained for 2026
Reading time: 14 minutes
Water in your basement isn’t just an inconvenience — it’s a slow-moving disaster. Whether it’s a suspicious damp patch after heavy rain, a musty smell that won’t quit, or full-blown standing water after a storm, basement moisture problems affect millions of homeowners every year. According to the American Society of Home Inspectors (ASHI), approximately 60% of U.S. homes with basements experience some form of moisture infiltration — and that number has been climbing as extreme weather events become more frequent.
Here’s the good news: you don’t always need to call in a $10,000 contractor to fix it. With the right materials, methods, and a weekend or two of effort, DIY basement floor waterproofing is not only possible — it can be genuinely effective and long-lasting.
This guide cuts through the noise. We’ll walk you through the science of basement moisture, the best materials available in 2026, the most reliable DIY methods, and how to avoid the costly mistakes that send homeowners back to square one.
Table of Contents
- Why Water Gets In: Understanding Basement Moisture
- Waterproofing Materials Explained
- DIY Methods: Step-by-Step Approaches
- Comparing the Options: A Quick Reference
- Common Challenges and How to Overcome Them
- Cost Breakdown and What to Budget in 2026
- Frequently Asked Questions
- Your Waterproofing Action Plan: Next Steps
Why Water Gets In: Understanding Basement Moisture
Before you buy a single bucket of sealant, you need to understand why water is entering your basement. Treating the symptom without addressing the source is the single biggest mistake DIYers make — and it’s the reason so many waterproofing projects fail within a year or two.
There are three primary sources of basement moisture:
- Hydrostatic pressure: Groundwater builds up in the soil around your foundation and literally pushes through the concrete or block walls and floor. This is especially common after heavy rain or snowmelt.
- Capillary action: Concrete is porous. Even without visible cracks, moisture wicks upward through the slab by capillary action — the same process that draws water up through a paper towel.
- Condensation: Warm, humid indoor air meets cool basement surfaces and condenses into liquid water. This is often mistaken for a leak but is purely a humidity management issue.
Quick Diagnostic Test: Tape a 12″x12″ piece of aluminum foil tightly to your basement floor and leave it for 24–48 hours. If moisture appears on the underside of the foil, water is coming up through the slab. If it’s on the top, you’re dealing with condensation. This simple test can save you from buying entirely the wrong solution.
The Role of Soil and Drainage
Your home’s grading and drainage situation plays a massive role. If the ground around your home slopes toward the foundation, every rainstorm is essentially directing water right at your basement walls and floor. The International Residential Code (IRC) recommends a minimum 6-inch drop over the first 10 feet away from the foundation — but many older homes were never graded to this standard, and soil settlement over decades makes the problem worse.
In 2025, FEMA updated its residential flood resilience guidelines to specifically call out improper grading as a leading contributor to basement flooding in properties not located in designated flood zones. Translation: even if you’re not in a “flood area,” your landscaping may be working against you.
Cracks: The Uninvited Entry Points
Concrete shrinks as it cures, and over decades it settles, shifts, and cracks. Hairline cracks in a poured concrete floor are nearly universal in homes older than 15 years. The critical distinction is between static cracks (stable, not growing) and active cracks (still moving due to ongoing settlement or pressure). Active cracks require a flexible repair material; static cracks can be treated with rigid epoxy injection or hydraulic cement.
Waterproofing Materials Explained
The waterproofing materials market has evolved significantly. In 2026, homeowners have access to a wider range of high-performance products than ever before — including several new hybrid polymer formulations that have outperformed traditional options in independent testing. Here’s a breakdown of the core material categories:
1. Crystalline Waterproofing Compounds
Crystalline technology is one of the most exciting developments in the DIY waterproofing space. These products — typically applied as a slurry or dry shake — contain reactive chemicals that, when exposed to water, grow microscopic crystals that literally fill the pores and microcracks in concrete. The crystals keep growing over time, meaning the material becomes more effective as the concrete ages and as it’s exposed to more moisture.
Brands like Xypex and Kryton’s Krystol have long been industry standards, and in 2025, several more accessible consumer-grade versions entered the market at lower price points. Crystalline products are particularly effective for DIY floor applications because they bond permanently with the concrete substrate — they don’t peel, blister, or delaminate.
Best for: Concrete slabs with capillary moisture and minor crack infiltration. Not ideal for large active cracks or floors subject to significant hydrostatic uplift.
2. Cementitious Waterproofing Coatings
These are the workhorses of the basement waterproofing world. Cementitious coatings are cement-based products mixed with polymer additives and waterproofing agents. They’re brushed or rolled onto the floor surface, creating a rigid, bonded membrane. Products like Drylok Extreme and RadonSeal Plus fall into this general category.
They’re easy to apply, widely available at hardware stores, and reasonably affordable. However, their rigidity is also their weakness — they can crack if the substrate moves. They work best on stable floors with minimal active cracking.
Best for: General moisture control, concrete block floors, and as a first line of defense in low-to-moderate moisture conditions.
3. Epoxy and Polyurethane Coatings
These two-part systems create a hard, seamless membrane on the floor surface. Epoxy coatings are extremely durable, chemical resistant, and create a near-impermeable barrier. Polyurethane coatings are slightly more flexible, making them better suited to floors with minor movement. In 2026, several manufacturers have introduced water-based epoxy formulations that are lower in VOCs and easier to clean up while maintaining strong performance.
Best for: Garages converted to living space, basement floors that will receive foot traffic, and situations where you want a finished, attractive floor surface in addition to waterproofing.
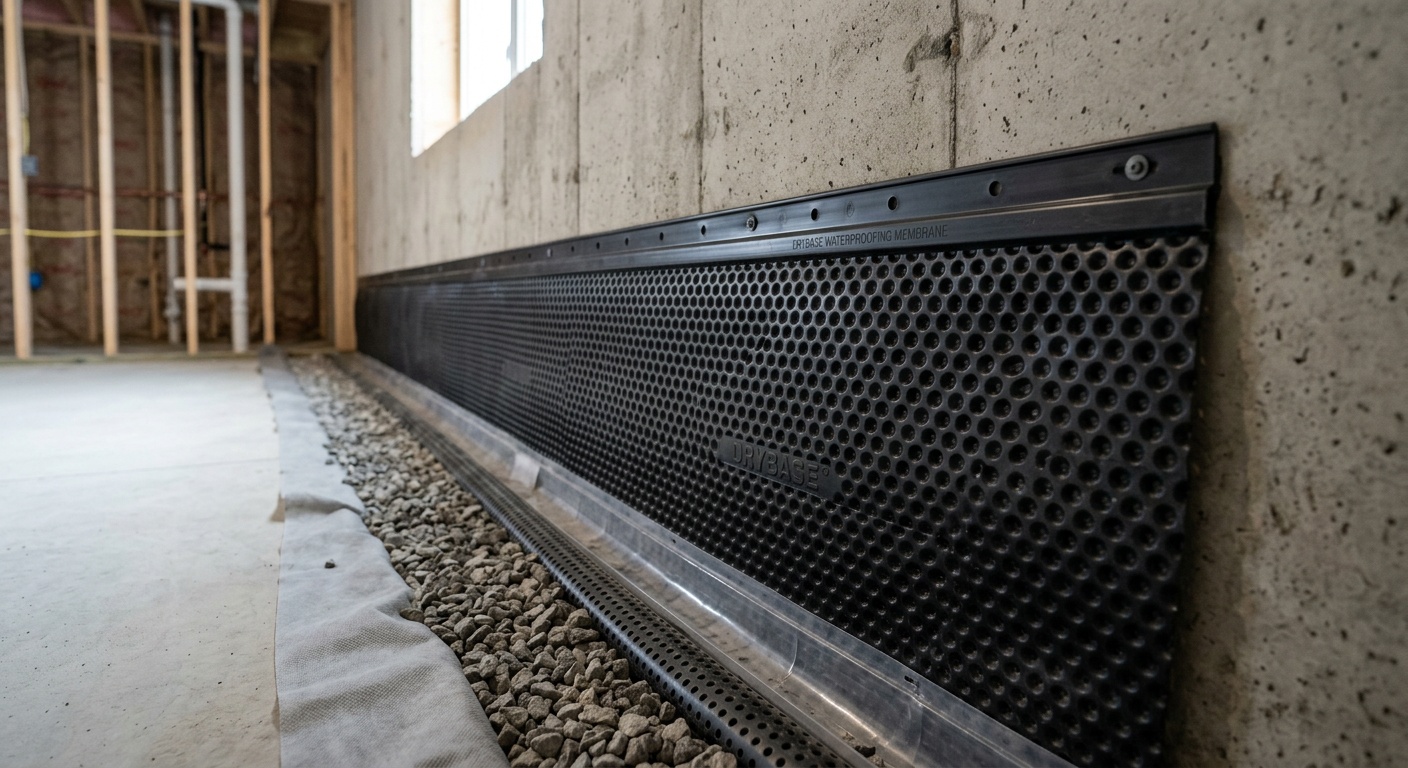
4. Drainage Membranes and Dimple Mats
Rather than blocking water, dimple mat systems (like Delta-FL or Platon) create a drainage layer between the concrete floor and your finished floor. The raised dimples create an air gap, allowing any moisture that does penetrate the slab to drain harmlessly to a perimeter drain or sump system rather than pooling under your flooring material.
This is a fundamentally different philosophy: instead of stopping water, you’re managing it. For floors with persistent hydrostatic pressure, this approach is often more realistic and durable than trying to block water entirely.
Best for: High-moisture floors, finished basements, and situations where hydrostatic pressure is too significant for surface coatings alone.
5. Hydraulic Cement and Polyurethane Injection Foam
These are crack and joint repair materials rather than full floor treatments. Hydraulic cement (like Quikrete Hydraulic Water-Stop) expands as it sets and can stop active water flow in cracks — useful for plugging a gushing crack before you apply a broader treatment. Polyurethane injection foam (used by professionals but increasingly available in DIY-friendly cartridge systems) is flexible after curing and is ideal for sealing actively moving cracks.
Best for: Pre-treatment crack repair before applying any coating system.
DIY Methods: Step-by-Step Approaches
Let’s get practical. Here are the most effective DIY approaches for basement floor waterproofing, organized from the simplest to the most comprehensive.
Method A: The Surface Coating Approach
This is the most common DIY method and the right choice for floors with moderate, stable moisture issues — capillary dampness, minor seepage, or condensation-related problems.
- Test and diagnose: Use the foil test described earlier. Conduct a moisture meter reading (inexpensive digital models are available for under $30). Document any visible cracks.
- Repair cracks first: Fill static cracks with hydraulic cement or an epoxy injection kit. Allow full cure time (usually 24–48 hours). Active or wide cracks need polyurethane foam injection.
- Clean the floor thoroughly: Sweep, vacuum, and scrub. Remove all paint, sealers, efflorescence (white chalky deposits), oil stains, and debris. A floor grinder or shot blaster (rentable at most home improvement stores) is ideal for large areas. The coating cannot bond to anything that isn’t bare, clean concrete.
- Etch the surface: Apply a muriatic acid solution (typically 1 part acid to 10 parts water) or a commercial concrete etcher to open the pores of the concrete and improve adhesion. Rinse thoroughly and allow to dry completely.
- Apply the waterproofing coating: Follow product-specific instructions. Most cementitious products go on with a stiff-bristled masonry brush or a heavy-nap roller in 2 coats, allowing appropriate drying time between coats. Apply from the far corner back toward the exit — don’t trap yourself.
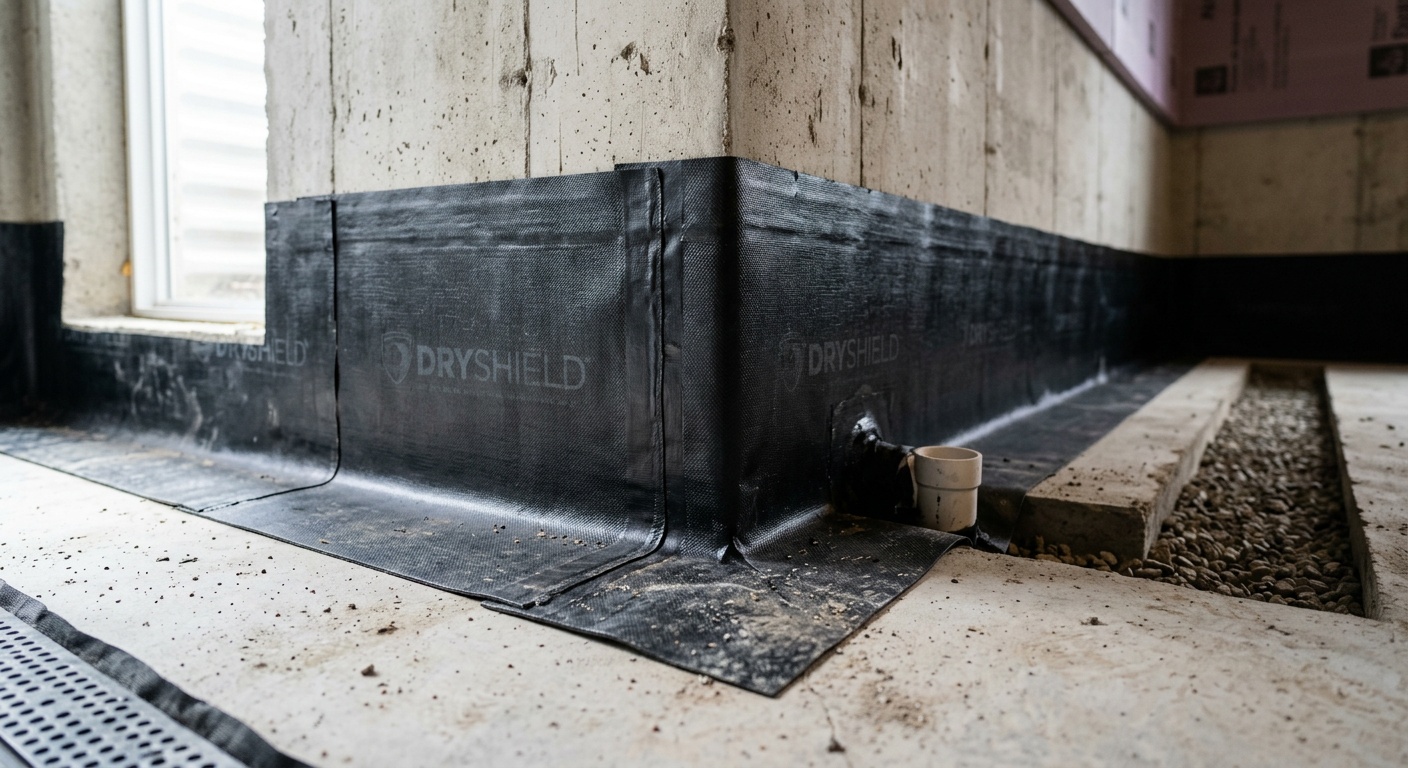
- Seal the floor-wall joint: This is the most vulnerable point. Apply hydraulic cement or a flexible polyurethane caulk specifically to the cove joint (the corner where the floor meets the wall) before applying your main coating.
Method B: The Dimple Mat + Drainage System
This method is appropriate for basements with significant ongoing moisture where coatings alone won’t cut it. It’s more involved but far more reliable for chronic problems.
- Install or verify your sump pump system: A drainage approach is only as good as the place moisture can drain to. If you don’t have a functional sump pit and pump, install one first. In 2026, battery-backup sump pumps have become much more affordable — budget around $200–$400 for a quality unit.
- Install a perimeter drain channel: Cut a 4–6 inch channel around the perimeter of the floor using a concrete saw. This is demanding work — ear protection and a dust mask are essential. Fill this channel with gravel and a perforated pipe that drains to the sump pit.
- Roll out the dimple mat: Starting from one wall, roll out your drainage membrane (dimple side down) across the entire floor. Overlap seams by at least 6 inches. Tape seams with manufacturer-recommended tape.
- Install finished flooring over the membrane: Engineered hardwood, luxury vinyl plank, or floating laminate all work well over dimple mat systems. The air gap below manages moisture while the finished floor sits dry above.
Real-World Example: A homeowner in Columbus, Ohio tackled a chronically wet basement in early 2026 after two consecutive wet springs. After getting quotes ranging from $8,500 to $14,000 from waterproofing contractors, she opted for a dimple mat + sump pump upgrade DIY approach. Total materials cost: approximately $1,100. The project took two weekends. After the next storm cycle in April, the basement stayed dry for the first time in years. The key was combining the drainage mat with a new battery-backup sump pump — addressing both water management and power failure risk.
Comparing the Options: A Quick Reference
| Method / Material | Best For | DIY Difficulty | Avg. Cost (2026) | Durability |
|---|---|---|---|---|
| Cementitious Coating | Low-moderate moisture | Easy | $0.15–$0.40/sq ft | 5–10 years |
| Crystalline Compound | Capillary moisture | Moderate | $0.50–$1.10/sq ft | 15–25+ years |
| Epoxy/Polyurethane Coat | Traffic + moisture control | Moderate–Hard | $1.50–$3.00/sq ft | 10–20 years |
| Dimple Mat System | Chronic/high moisture | Moderate | $0.60–$1.20/sq ft | 20–30+ years |
| Drainage + Sump System | Severe hydrostatic pressure | Hard | $1,500–$3,500 total | 25–40+ years |
Effectiveness by Moisture Severity — Visual Comparison
Effectiveness Score (out of 100) by Moisture Severity Level:
*Scores reflect effectiveness against moderate-to-severe ongoing moisture infiltration, based on independent contractor and homeowner surveys compiled in 2025–2026.
Common Challenges and How to Overcome Them
Challenge 1: The Coating Won’t Bond or Peels Off
This is the most common failure mode in DIY waterproofing projects — and it’s almost always caused by inadequate surface preparation. If the concrete has any existing sealer, paint, oil contamination, or efflorescence, no coating will bond properly regardless of how expensive it is.
Solution: Don’t skip surface prep. Rent a floor grinder with diamond grinding pads for $60–$90/day from your local equipment rental. Grind the entire surface until you see fresh, open concrete. If efflorescence is present, scrub it off with a diluted muriatic acid solution and rinse thoroughly. Test adhesion before applying a full coat — press a piece of duct tape firmly onto the prepared surface and pull it off sharply. If concrete powder transfers to the tape, keep cleaning. The floor isn’t ready yet.
Challenge 2: Water Returns After Heavy Rain
You applied a coating, it looked great, and then a heavy spring storm hit. Water appeared again — maybe in the same spot, maybe somewhere new. This is a sign you’ve addressed the floor surface but haven’t dealt with the source pressure pushing moisture in.
Solution: Recheck your exterior drainage. Are gutters clogged or downspouts directing water toward the foundation? Is the grade around your home sloping toward the house? Exterior improvements — extending downspouts at least 6 feet from the foundation, re-grading soil, and installing window well covers — should be part of every waterproofing strategy. Interior coatings are a second line of defense, not the only defense.
Case Study: A homeowner in Portland, Oregon spent $800 on Drylok Extreme coating in 2025, only to have a wet basement again by March 2026 after a record rainfall event. A proper inspection revealed that the neighbor’s yard was draining directly against his foundation. After installing a French drain along the property line and adding 10-foot downspout extensions on two gutters, he reapplied the coating. The second application held without issue — demonstrating that exterior drainage and interior treatment are complementary, not interchangeable.
Challenge 3: Dealing With an Uneven or Damaged Floor
Many older basement floors have significant unevenness, spalling (surface deterioration), or areas where the concrete is crumbling. Applying a coating over damaged concrete is a recipe for failure.
Solution: Use a self-leveling concrete underlayment (products like Ardex K-15 or Henry 547) to fill low spots and create a smooth, level surface before waterproofing. For spalling areas, apply a concrete repair mortar (Quikrete Concrete Resurfacer works well) and feather it in. Allow all repairs to cure fully — minimum 72 hours for most products — before applying any waterproofing treatment.
Cost Breakdown and What to Budget in 2026
Let’s be real about money. Material prices have stabilized somewhat after the supply chain volatility of 2023–2024, but skilled labor costs continue to rise. Here’s what a realistic DIY basement floor waterproofing project looks like in 2026 compared to professional quotes:
- Basic cementitious coating (1,000 sq ft): $150–$400 in materials. Professional equivalent: $1,500–$3,000.
- Crystalline treatment (1,000 sq ft): $500–$1,100 in materials. Professional equivalent: $2,500–$5,000.
- Full dimple mat + sump pump upgrade (1,000 sq ft): $1,000–$2,500 in materials. Professional equivalent: $8,000–$16,000.
- Tool rental (floor grinder, concrete saw, etc.): Budget $150–$300 for a weekend project.
- Crack repair supplies: $50–$200 depending on scope.
The potential savings are substantial — often 70–85% compared to professional installation for comparable outcomes. The investment of time is real (expect 1–3 weekends depending on complexity), but for homeowners willing to do the work properly, DIY waterproofing delivers excellent value.
Pro Tip: Don’t cut corners on materials to save money. The difference between a $25 gallon of entry-level sealer and a $60 gallon of professional-grade product is often the difference between a 3-year solution and a 15-year solution. Spend on materials, save on labor.
Frequently Asked Questions
Can I waterproof my basement floor without removing existing flooring or coatings?
In most cases, no — and attempting to do so is one of the most common DIY mistakes. Waterproofing coatings and treatments need to bond directly to bare, clean concrete to be effective. Any existing paint, sealer, adhesive residue, or flooring material will prevent adhesion and cause the new treatment to fail. The only exception is a dimple mat drainage membrane, which can sometimes be installed over a relatively flat existing slab surface as long as it’s structurally sound — but even then, pre-treating cracks beneath is strongly recommended.
How do I know if my basement moisture problem requires a professional instead of a DIY approach?
There are several clear indicators that professional assessment is needed. If you’re seeing active water flowing (not just seeping) through the floor during rain events, if there are multiple large cracks (wider than 1/4 inch) or step-cracking in the floor suggesting structural movement, if the floor shows signs of significant heaving or settlement, or if water appears in dry weather (suggesting a high water table rather than surface drainage issues), you should consult a structural engineer or certified waterproofing contractor. DIY methods are highly effective for moisture management — they’re not appropriate for structural issues or genuinely high water table situations without a comprehensive drainage system.
What is the single most important step in any basement floor waterproofing project?
Surface preparation, without question. Every waterproofing professional and manufacturer will tell you the same thing: 80% of waterproofing failures trace back to inadequate prep work. It’s the least glamorous part of the project, it takes the most time, and it’s the step that most DIYers shortcut. Clean, open, structurally sound concrete that’s free of contaminants and has all cracks properly repaired is the foundation every successful waterproofing treatment needs. Spend more time on prep than on application, and your results will reflect it. A coating applied to a perfectly prepared floor at moderate cost will dramatically outperform a premium coating applied to a poorly prepared surface.
Your Basement Waterproofing Action Plan: Next Steps
You now have a comprehensive foundation — pun intended — to approach your basement floor waterproofing project with genuine confidence. Let’s make this actionable. As you step away from this guide and toward your basement, here’s your concrete roadmap:
- This week — Diagnose before you buy anything: Run the foil test. Walk the perimeter of your foundation exterior. Check your gutters and downspout extensions. Take photos of all visible cracks and damp areas. This diagnostic step is free and will clarify exactly which material and method is right for your specific situation.
- Week two — Repair first, waterproof second: Address all cracks, joint failures, and surface damage before purchasing your primary waterproofing product. A $20 tube of hydraulic cement can be the difference between a successful project and a failed one.
- Weekend project — Surface prep is your superpower: Rent a floor grinder. Grind the entire floor. Etch, rinse, and dry. Your coating’s lifespan depends entirely on what you do before you open the bucket.
- Apply systematically and layer wisely: Work from the back of the space toward the exit. Apply two coats minimum on any cementitious product. Don’t rush drying times between coats — patience here is free insurance.
- After the project — Monitor and document: After the next major rainfall, inspect the floor carefully. Take notes. If you spot any areas of concern in year one, address them immediately before they expand. Most DIY waterproofing systems allow for spot repair and touch-up.
As extreme weather events become more frequent and property insurance coverage for water damage tightens across much of the U.S. and Canada, proactive basement waterproofing is shifting from a “nice to have” home improvement to an essential part of residential resilience planning. Homes that are already protected when the next major storm season hits are homes with owners who made smart, early decisions.
So here’s the question to ask yourself today: Is your basement floor working for you, or against you? With the right materials, a clear method, and the preparation mindset this guide has outlined, you have everything you need to turn that damp, uncertain space into a reliable, dry foundation for whatever you choose to build on top of it. The project is achievable. The savings are real. The dry basement on the other side of that project is completely within your reach.